I love the Fuji Instax Mini 12. Once you get the hang of it, its an easy camera to throw into your pocket to take photos of friends and family. Part of the fun of film is taking chances, so don’t be afraid to try out new things and experiment as you learn how to shoot with the Mini 12.
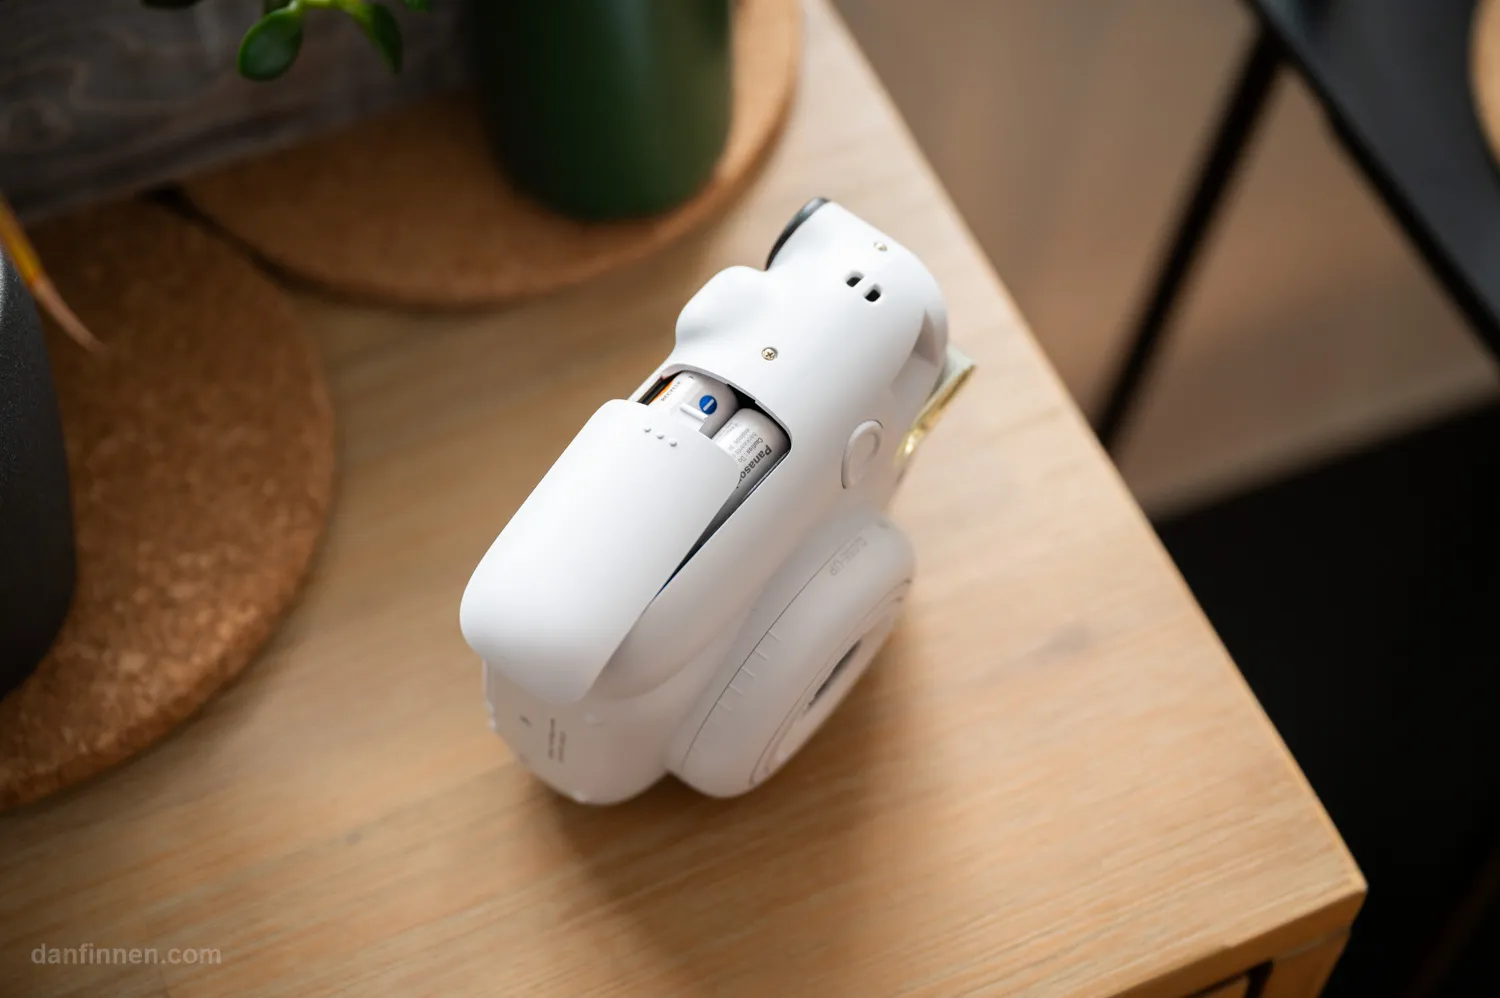
Insert Batteries
Step one is to put fresh batteries into your camera. Open the side panel by sliding it down. Don’t worry if it feels a bit crunchy – this isn’t the best battery door on the planet so it can be a pain to open and close.
The camera comes with AA alkaline batteries, which you can use, but I recommend using rechargeable lithium AA batteries if at all possible. If you don’t use your camera on a regular basis, they will often leak and ruin your camera. So either make sure to always take out the AAs after using (which I find hard to do), or use rechargeable lithium AAs which will just peacefully lose charge instead of ruining your Instax Mini 12.
Insert Film
Once you have the batteries installed, now it’s time to put film into the camera. The Instax Mini 12 uses Instax Mini film. Do not use Instax Square, Instax Wide, or Polaroid film – those formats will not work with this camera. Instax Mini film comes in color and monochrome variants (which is my favorite) with wide variety of border colors. All work great with the Instax Mini 12.

The interior with no film inside
You’ll know your camera has no film by looking into window on the back. If there is no visible yellow line, the camera is empty. If there is a visible yellow line, you can look at the dial below to check how many photos remain. When it says zero, you’re good to take out the old cartridge. (Note that if there is no film in the camera at all, it will likely have an S in the counter – that’s why you should check the window first)
Open your pack of new film and set it aside. Then, open the back door compartment of the Instax Mini camera. Remove the old pack if there is one in there.
